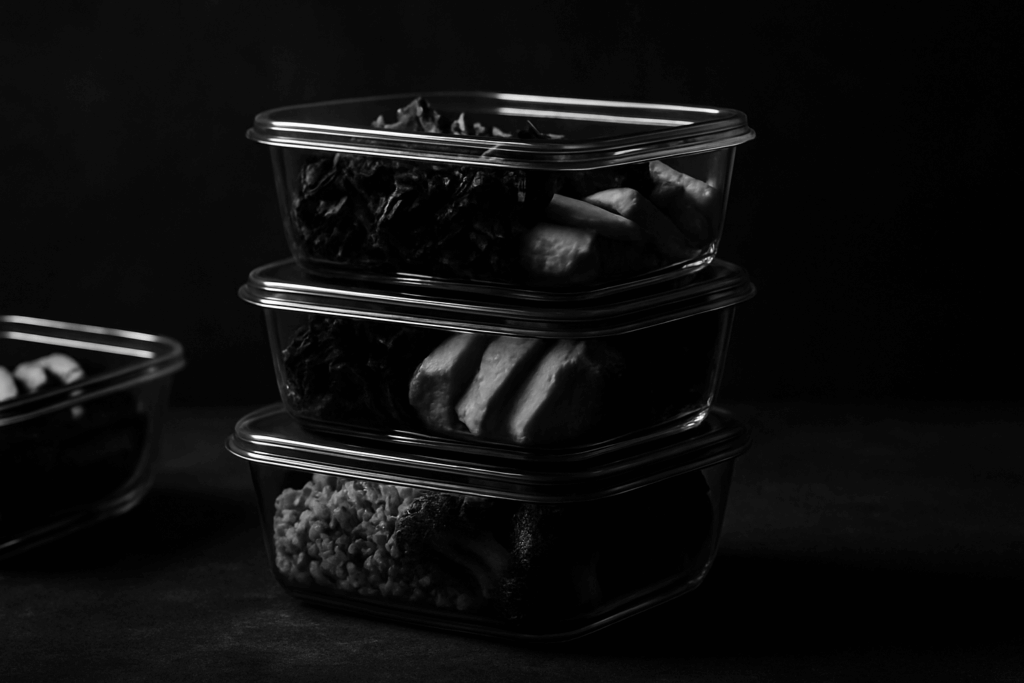
Start With the Right Containers
If you want your prepped meals to stay fresh, start with what you put them in. Airtight containers are non negotiable air is the enemy of freshness. Glass containers beat plastic hands down. They don’t hold smells, they’re tougher over time, and you can go straight from fridge to microwave without worrying about chemicals leaching into your food.
Speaking of chemicals: ditch anything that isn’t BPA free. It’s not worth the risk, especially if you’re reheating meals regularly. Look for containers labeled microwave and dishwasher safe to streamline your routine.
One more no brainer label your meals. A dry erase marker works great on most glass or plastic lids. Just write the date you prepped the meal. That tiny step makes a big difference when you’re staring into the fridge on Thursday, wondering what’s still edible.
Cool It Fast
Proper cooling isn’t just a suggestion it’s a critical step in preventing spoilage and keeping your meals safe to eat. Bacteria thrive in the “danger zone” between 40°F and 140°F, so time and container choice matter here.
Refrigerate Within Two Hours
Always move cooked food to the fridge or freezer within two hours, especially after meal prep.
In warm climates or during summer, shorten that window to one hour to be safe.
Portion for Speed
Divide large batches into smaller, meal sized portions right after cooking.
Smaller portions cool faster and more evenly, reducing the risk of bacteria growth.
Choose Shallow Containers
Opt for wide, shallow containers to allow food to cool quickly.
Avoid deep containers, which trap heat and slow down cooling.
Leave containers uncovered briefly (15 20 minutes) on the counter before sealing and refrigerating to let steam escape.
Getting your food to a safe temperature quickly not only preserves taste and texture it extends shelf life and keeps your meal prep game strong.
Know Your Zones
Not all fridge shelves are created equal and knowing what goes where keeps your food fresher, longer.
Top shelf is prime real estate. That’s where your ready to eats go: think salads, sliced fruit, and grab and go snacks. This area stays the most consistent in temperature, which means less risk for spoilage.
The middle shelf is your zone for prepped, cooked meals. These are already safely cooked, so they’re less risky than raw foods but you still want them chilled and stable before use. Keep your containers sealed tight here.
Bottom shelf is the wild card. If you absolutely need to store raw ingredients like uncooked meat or fish keep them at the bottom. Cold air sinks, so it’s the coldest spot, and it helps prevent drips from contaminating other food.
Whatever you do, avoid the fridge door for anything sensitive. It’s the warmest area and experiences the most temp swings every time the door opens. Leave the butter and condiments there. Everything else deserves better.
Freeze for Longevity

Freezing can be a game changer but only if you do it right. Start by portioning your meals into single servings. It makes reheating faster and cuts down on waste. You won’t have to thaw more than you need, which means fewer soggy leftovers and better control over your meal plan.
Next, get serious about air. Oxygen is the enemy it causes freezer burn, ruins texture, and nukes flavor. A vacuum sealer is ideal, but if you don’t have one, press out the air manually from freezer bags. Flatten the bags to stack more efficiently, too.
Finally, label everything. Use the contents and freeze date it doesn’t need to be fancy. A strip of masking tape and a marker will do just fine. When your freezer looks like a well run library, grabbing what you need is fast and frustration free.
Smart Thawing
Properly thawing prepped meals is just as important as storing them. Doing it wrong can lead to food safety issues and poor taste. Here’s how to do it right:
Plan Ahead
Refrigerator thawing is the safest route. Move meals from the freezer to the fridge at least 24 hours before you plan to eat them.
This method keeps food at a safe temperature while slowly returning it to a ready to eat state.
What to Avoid
Never thaw food on the counter. Room temperature promotes bacterial growth and dramatically increases the risk of foodborne illness.
Don’t leave frozen meals sitting out even if they’re in sealed containers.
Quick Option: Microwave Defrost
Use the microwave’s thaw or low power setting only when you plan to eat the meal immediately afterward.
Once defrosted, food should be cooked or reheated fully to safe internal temperatures.
Microwaving can unevenly defrost dense items, so stir or flip partway through whenever possible.
Thawing the right way protects both your health and the taste of your meals.
Shelf Life Tips
Not all prepped food lasts the same, so knowing the basics keeps you from playing fridge roulette. Cooked grains and proteins like rice, quinoa, grilled chicken, tofu hold up for about 3 to 4 days in the fridge. Past that, things get questionable in texture and taste.
Soups and stews are the long haul champs. Freeze those, and you’ve got solid meals for 2 to 3 months. Just cool them fully before storing, and use airtight containers to dodge freezer burn.
Leafy greens and fresh herbs are more delicate. Wash and dry them thoroughly, then wrap in a paper towel before storing in a container or produce bag. The paper towel absorbs moisture, which helps prevent soggy spinach and slimy basil.
Think of storage as part of the prep not a throwaway step. Done right, it buys you time and keeps your food tasting the way it should.
Use Longer Lasting Ingredients
If your goal is to meal prep once and make it count, start with ingredients that naturally hold up. Hard vegetables like carrots, sweet potatoes, and cabbage don’t wilt under a few days in the fridge. Legumes think lentils, chickpeas, and beans not only stay fresh longer but actually taste better after a day or two as flavors develop. Whole grains like quinoa and brown rice are also strong contenders; they keep their texture and can anchor multiple meals without falling apart.
The trick is to stop choosing foods based only on flavor and start thinking about function too. Swapping in sturdy ingredients means less spoilage and fewer sad containers in the back of the fridge. To go deeper, check out this list of foods that last longer and stretch your prep further without compromising on what ends up on your plate.
Final Tip: Don’t Overdo It
Meal prep is a time saver, but going overboard can do more harm than good. If you’re prepping meals too far in advance, you risk not only sacrificing taste but also food safety.
Why Timing Matters
4 5 days is the sweet spot. Beyond that, meals start to lose texture, flavor, and nutritional value.
Food safety first. Bacteria can grow even in the fridge over time, especially in moist or protein rich dishes.
Keep It Fresh and Fun
To avoid getting bored and to minimize waste, don’t eat the same meal on repeat all week.
Rotate meals so you’re not eating the same dish every day.
Mix up key ingredients use one protein in different ways across meals.
Incorporate freezer meals toward the end of the week.
Plan Smart, Waste Less
Balancing freshness with convenience is key. Prep just enough to make your week easier, but not so much that meals go uneaten.
For more planning hacks, check out our list of foods that last longer—a helpful guide to keep your ingredients (and your efforts) from going to waste.

 Ask Jalric Velmyre how they got into delicious recipe ideas and you'll probably get a longer answer than you expected. The short version: Jalric started doing it, got genuinely hooked, and at some point realized they had accumulated enough hard-won knowledge that it would be a waste not to share it. So they started writing.
What makes Jalric worth reading is that they skips the obvious stuff. Nobody needs another surface-level take on Delicious Recipe Ideas, Meal Prep Ideas, Healthy Eating Tips. What readers actually want is the nuance — the part that only becomes clear after you've made a few mistakes and figured out why. That's the territory Jalric operates in. The writing is direct, occasionally blunt, and always built around what's actually true rather than what sounds good in an article. They has little patience for filler, which means they's pieces tend to be denser with real information than the average post on the same subject.
Jalric doesn't write to impress anyone. They writes because they has things to say that they genuinely thinks people should hear. That motivation — basic as it sounds — produces something noticeably different from content written for clicks or word count. Readers pick up on it. The comments on Jalric's work tend to reflect that.
Ask Jalric Velmyre how they got into delicious recipe ideas and you'll probably get a longer answer than you expected. The short version: Jalric started doing it, got genuinely hooked, and at some point realized they had accumulated enough hard-won knowledge that it would be a waste not to share it. So they started writing.
What makes Jalric worth reading is that they skips the obvious stuff. Nobody needs another surface-level take on Delicious Recipe Ideas, Meal Prep Ideas, Healthy Eating Tips. What readers actually want is the nuance — the part that only becomes clear after you've made a few mistakes and figured out why. That's the territory Jalric operates in. The writing is direct, occasionally blunt, and always built around what's actually true rather than what sounds good in an article. They has little patience for filler, which means they's pieces tend to be denser with real information than the average post on the same subject.
Jalric doesn't write to impress anyone. They writes because they has things to say that they genuinely thinks people should hear. That motivation — basic as it sounds — produces something noticeably different from content written for clicks or word count. Readers pick up on it. The comments on Jalric's work tend to reflect that.